Published on June 8, 2016
In circumstances where the router has a firewall which blocks the inverter IP address, the following steps can be taken to set a static IP address on the inverter:
- Create a static IP address using the router’s interface which will not be blocked by the firewall and will not be used for other devices. For example, create 192.168.1.123 for a case where the gateway IP of the route is 192.168.1.1 (Refer to a router’s manual to understand how to create a static IP on that specific router).
- Download SMA Connection Assist onto your PC. Link here. http://www.sma.de/en/products/monitoring-control/sma-connection-assist.html
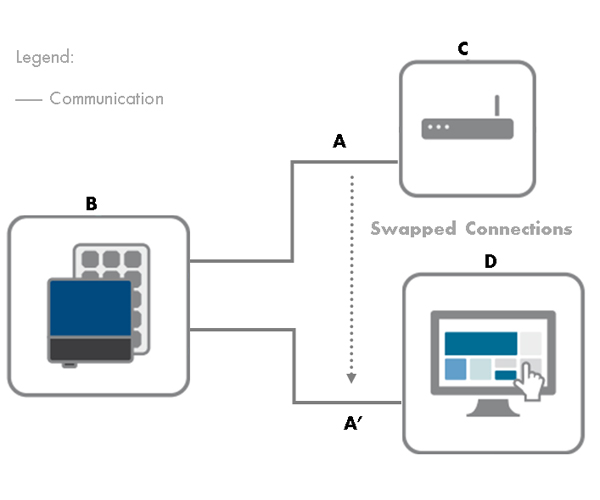
- Connect your PC directly to your inverter temporarily, using the ethernet cable (CAT5 or CAT6 cable) between the inverter and router.

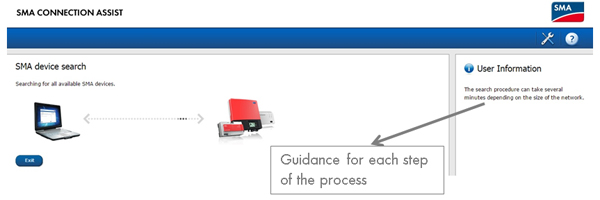
4. After the ethernet cable connection is set up, run the SMA Connection Assist and search for the devices in the local speed wire network. The information on the right-hand side of the interface of the SMA Connection Assist provides guidance regarding each step of the process.

Searching for devices on the local network
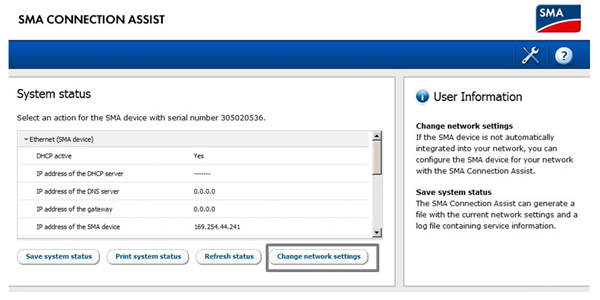
- Using SMA Connection Assist, under the tab ‘Change network settings’, you can assign a static IP address to the inverter that you have created in the router’s interface (see image below).
- After the settings have initialised, the webconnect module will promptly change to a static IP address which will allow the inverter to communicate under a secured network through firewall.

Other Uses
SMA Connection Assist can also provide assistance for other troubleshooting issues. For example, if you have forgotten the static IP address of an inverter and you are no longer able to detect the device on Sunny Portal or Sunny Explorer, SMA Connection Assist is able to detect the device and change the settings from static IP address to Dynamic IP address. This allows the router to assign a new IP address to the inverter to connect to the internet. After this process, Sunny Explorer is able to detect the device.